Lemon-Thyme Chicken with Shaved Brussels Sprouts

Introducing a dish that not only delights the taste buds but also supports the unique nutritional needs of aging women—Lemon-Thyme Chicken with Shaved Brussels Sprouts. This recipe is packed with ingredients that promote bone health, boost energy, and support overall vitality. The lean chicken provides high-quality protein essential for maintaining muscle mass, while Brussels sprouts offer a rich source of fiber and vitamin K, crucial for bone strength. The addition of almonds and olive oil brings healthy fats that support heart health, and a touch of turmeric adds anti-inflammatory benefits. This meal is a flavorful and wholesome way to nourish your body and maintain your well-being.

Feel free to print, pin and share this recipe!
Lemon-Thyme Chicken with Brussels Sprouts

Menopause Network Contributor
Lemon-Thyme Chicken with Shaved Brussels Sprouts is a healthy and flavorful dish that's perfect for a wholesome dinner. Tender chicken breasts are marinated in a zesty lemon-thyme blend, then seared to golden perfection. Paired with sautéed Brussels sprouts mixed with slivered almonds and dried cranberries, this meal is not only delicious but also packed with nutrients, making it an ideal choice for a nutritious, balanced diet.
Prep Time 20 minutes
Cook Time 30 minutes
Marinating 30 minutes
Total Time 1 hour 20 minutes
Course Main Course
Cuisine American
Servings 4 servings
Calories 350 kcal

Equipment

  • 1 Large bowl for marinating
  • 1 Large skillet or pan
  • 1 Knife
  • 1 Cutting board
  • Measuring spoons
  • 1 Large pan for Brussels sprouts
  • Tongs

Ingredients
  

For the Chicken:

  • 4 boneless skinless chicken breasts
  • 2 lemons 1 for juice, 1 for slices
  • 2 tbsp fresh thyme leaves or 1 tsp dried thyme
  • 3 garlic cloves minced
  • 2 tbsp olive oil
  • ½ tsp ground turmeric
  • ½ tsp ground black pepper
  • ¼ tsp salt

For the Shaved Brussels Sprouts:

  • 3 cups Brussels sprouts thinly sliced or shaved
  • 2 tbsp olive oil
  • 1 tbsp apple cider vinegar
  • ¼ cup slivered almonds
  • ¼ cup dried cranberries unsweetened
  • 1 tbsp grated Parmesan cheese* optional
  • Salt and pepper to taste

Instructions
 

Marinate the Chicken:

  • In a large bowl, mix the juice of 1 lemon, thyme, garlic, olive oil, turmeric, black pepper, and salt.
  • Add chicken breasts and coat thoroughly. Marinate for at least 30 minutes.

Cook the Chicken:

  • Preheat the oven to 375°F (190°C).
  • Heat olive oil in an oven-safe skillet over medium heat. Sear chicken for 3-4 minutes on each side.
  • Add lemon slices to the skillet and transfer to the oven. Bake for 20-25 minutes until cooked through (165°F or 74°C).

Prepare the Brussels Sprouts:

  • Heat olive oil in a large pan over medium heat.
  • Add shaved Brussels sprouts and sauté for 5-7 minutes.
    Lemon-Thyme Chicken with Shaved Brussels Sprouts
  • Stir in apple cider vinegar, slivered almonds, and dried cranberries. Cook for another 2-3 minutes.
  • Sprinkle with Parmesan if using, and season with salt and pepper.

Serve:

  • Serve chicken with a side of shaved Brussels sprouts.
  • Garnish with extra thyme or lemon slices if desired.

Notes

Nutritional Facts (Per Serving):

  • Calories: 350
  • Protein: 30g
  • Carbohydrates: 15g
  • Fat: 18g
  • Fiber: 5g
  • Sodium: 350mg
  • Sugars: 5g


Nutritional Benefits:

  • Chicken: Provides lean protein for muscle maintenance.
  • Turmeric: Offers anti-inflammatory properties, aiding joint health.
  • Brussels Sprouts: High in fiber, vitamin C, and vitamin K, supporting digestion and bone health.
  • Almonds: Contain healthy fats that support heart health.
  • Cranberries: Packed with antioxidants for overall health.


Shopping List:

  • 4 boneless, skinless chicken breasts
  • 2 lemons
  • Fresh thyme (or dried thyme)
  • Garlic cloves
  • Olive oil
  • Ground turmeric
  • Ground black pepper
  • Salt
  • Brussels sprouts
  • Apple cider vinegar
  • Slivered almonds
  • Dried cranberries (unsweetened)
  • Parmesan cheese (optional)


Tips:

  • Marinate Overnight: For extra flavor, marinate the chicken overnight.
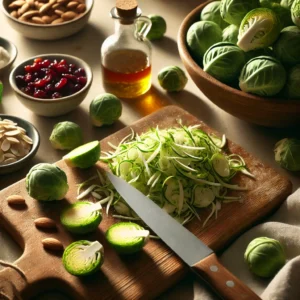
  • Slice Brussels Sprouts Thinly: Use a mandoline or sharp knife for even slicing.
  • Toast Almonds: For added crunch, toast the almonds before adding them to the Brussels sprouts.


Storage:

  • Chicken: Store in an airtight container in the refrigerator for up to 3 days.
  • Brussels Sprouts: Store separately in the refrigerator for up to 3 days. Reheat in a pan or microwave.


Customization:

  • Vegetarian Option: Replace chicken with marinated tofu or tempeh.
  • Spice It Up: Add a pinch of red pepper flakes to the Brussels sprouts for a spicy kick.
  • Add Grains: Serve with a side of quinoa or brown rice for a more filling meal.


Health Disclaimer:

  1. Sodium Content:
    • The recipe contains 350 mg of sodium per serving, which is moderate but may need to be adjusted for individuals on a low-sodium diet, especially those with high blood pressure or heart conditions. Consider reducing the salt or using a salt substitute.
  2. Fat Content:
    • With 18g of fat per serving, this recipe provides healthy fats primarily from olive oil and almonds. However, those monitoring their fat intake, particularly saturated fat, should be mindful. You can reduce the amount of oil or use a lower-fat cooking method.
  3. Caloric Intake:
    • Each serving contains 350 calories, which is appropriate for a main course. However, if you are managing your weight, consider portion control or pairing this dish with a lighter side.
  4. Allergies:
    • This recipe includes almonds, which may be a concern for individuals with nut allergies. Substitute with seeds or omit entirely if necessary.
  5. Carbohydrates and Sugars:
    • The dish includes 15g of carbohydrates and 5g of sugar, mainly from cranberries. Those with diabetes or insulin resistance should be mindful of the sugar content. Opt for a smaller portion of cranberries or choose unsweetened varieties.
  6. Vitamin K Content:
    • Brussels sprouts are high in Vitamin K, which can interfere with blood-thinning medications like warfarin. Those on such medications should monitor their intake and consult with a healthcare provider.
  7. Portion Size:
    • The nutritional facts are based on one serving. Consuming larger portions will increase calorie, fat, sodium, and carbohydrate intake accordingly.
Keyword recipe

5 Homemade Shampoo for Hair Regrowth: Recipes & Tips

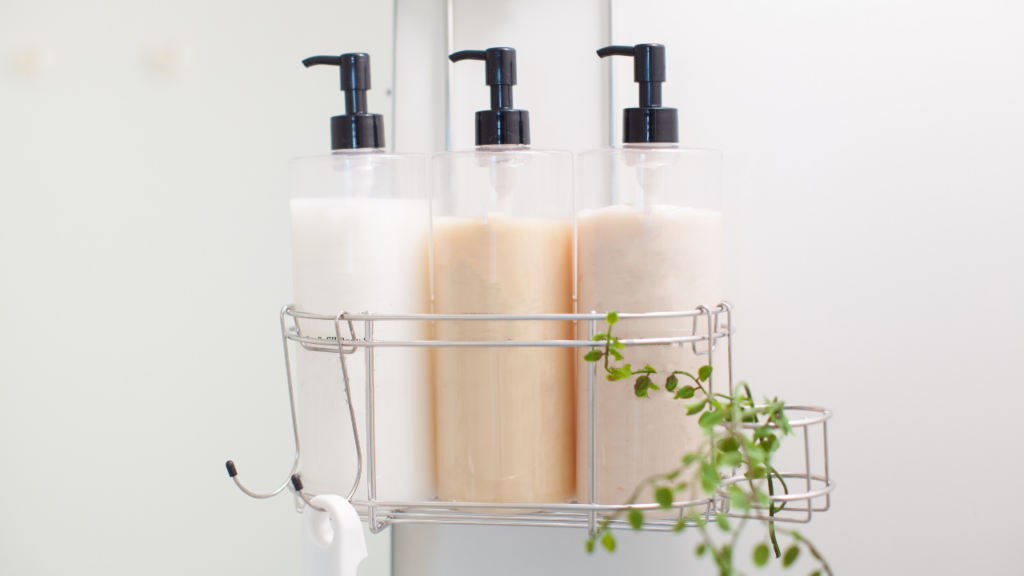
Creating your own shampoo at home can be a fun and natural way to take care of your hair. While there isn’t extensive research on homemade shampoos, some ingredients have been shown to benefit hair health. Here are a few DIY shampoo recipes and tips to help you get started.

1. Green Tea and Honey Boost Shampoo

This recipe is great for promoting hair growth and fighting dandruff. Green tea can help reduce dandruff, which can cause hair loss, and honey is an excellent moisturizer for dry hair.

Ingredients:

  • 2 tbsp. honey
  • 1 tsp. olive oil
  • ½ cup green tea
  • ¼ cup castile soap
  • 1 tsp. lime juice or aloe vera
  • 5–10 drops of peppermint and lavender essential oils

Directions:

  1. Brew green tea from leaves or tea bags.
  2. Combine the green tea with the other ingredients and mix well.

For those dealing with dandruff, it’s important to be cautious with homemade shampoos. Ingredients like olive oil can sometimes worsen dandruff.


2. CocoMint Herbal Bliss Shampoo

Experience the refreshing and nourishing benefits of CocoMint Herbal Bliss Shampoo. Made with natural ingredients like coconut milk, castile soap, and a blend of essential oils, this DIY shampoo promotes healthy hair growth while soothing your scalp.

Ingredients

  • 2/3 Cup Coconut Milk
  • 2/3 Cup Castile Liquid Soap
  • 1 Tablespoon Vitamin E Oil
  • 1 Tablespoon Olive Oil
  • 10 Drops Rosemary Essential Oil
  • 10 Drops Lavender Essential Oil
  • 10 Drops Tea Tree Essential Oil

Directions:

  1. Combine all the ingredients in a bottle.
  2. Shake bottle well to mix ingredients.
  3. Massage product gently into scalp.
  4. Leave in hair for at least 5 minutes then rinse well.
  5. Use daily for shampooing hair.

3. Carrot and Maple Shampoo

This recipe leverages the benefits of carrot seed oil, which has antifungal properties and stimulates hair growth, and maple syrup, which has antibacterial properties and nourishes hair.

Ingredients:

  • 15 drops carrot seed essential oil
  • 15 drops castor oil
  • 3 tbsp. maple syrup
  • ½ cup castile soap

Directions:

  1. Combine all ingredients until smooth.

4. Herb & Silk Natural Shampoo

Herb & Silk Natural Shampoo features coconut milk for moisturizing, castile soap for gentle cleansing, and optional olive oil for dry hair. Essential oils like lavender, rosemary, ylang-ylang, and tea tree offer soothing, antimicrobial, and conditioning benefits, promoting overall scalp health and hair growth.

Ingredients:

  • ¼ cup Coconut Milk (Can be replaced with water)
  • ¼ cup Castile Soap
  • ½ teaspoon Virgin Olive Oil (optional, for dry hair)
  • 10 drops Lavender Essential Oil
  • 10 drops Rosemary Essential Oil
  • 10 drops Ylang-ylang Essential Oil
  • 10 drops Tea Tree Oil

Directions:

  1. In a container, mix ¼ cup of coconut milk and ¼ cup of castile soap until smooth.
  2. Add ½ teaspoon of virgin olive oil if you have dry hair (skip if your hair is greasy).
  3. Thoroughly mix the ingredients, then transfer the mixture into a shampoo container.
  4. Add 10 drops each of lavender, ylang-ylang, rosemary, and tea tree essential oils to the container.
  5. Mix the solution well.

5. Aloe Vera Shampoo

Perfect for dry and brittle hair, this aloe vera recipe helps balance the scalp’s pH level and soothes irritation with almond oil.

Ingredients:

  • ½ cup castile soap
  • ½ cup water
  • ⅓ cup aloe vera
  • 4 tbsp. almond oil

Directions:

  1. Combine all ingredients and mix well.

Safety Tips

Switching to homemade shampoo can be beneficial, but there are a few things to keep in mind:

  • Adjustment Period: Your hair might take some time to adjust to the new ingredients. Be patient and give it time.
  • Hair and Scalp Conditions: If you have existing hair or scalp issues, consult a dermatologist before making changes to your routine. Homemade shampoos might not be formulated by experts, so they could unintentionally cause harm.
  • pH Levels: Be cautious of the pH level in your DIY shampoos. Ingredients like castile soap have a high pH and might not be suitable for color-treated hair or conditions like seborrheic dermatitis.

Patch Test

Before using any new ingredient, do a patch test on your inner arm. If there’s no reaction, it’s likely safe for you to use.

Takeaway

Making homemade shampoo can be simple, cost-effective, and beneficial for your hair. However, the evidence supporting DIY shampoos is mostly anecdotal. Always consult with your dermatologist if you have any concerns or pre-existing conditions. With the right approach, you can enjoy the natural benefits of homemade hair care.

Nightly Rituals: Sleep Your Way to Radiant Skin During Perimenopause

During perimenopause, the skin tends to dry out mainly due to hormonal changes, particularly a decline in estrogen levels. Estrogen plays a crucial role in maintaining skin health by stimulating the production of collagen and oils. Here’s how the drop in estrogen contributes to dry skin during perimenopause:

  1. Decreased Oil Production: Estrogen helps regulate the oil glands in the skin. As estrogen levels drop, these glands produce less oil, leading to drier skin.
  2. Reduced Collagen Production: Estrogen also promotes collagen production, which is vital for skin elasticity and moisture retention. Lower estrogen levels mean less collagen, which can lead to thinner, less elastic skin that retains less moisture.
  3. Thinning Epidermis: The outer layer of the skin, the epidermis, tends to thin with age and reduced estrogen, further diminishing the skin’s ability to retain moisture.
  4. Loss of Hyaluronic Acid: Estrogen helps maintain levels of hyaluronic acid, which binds water in the skin. As estrogen declines, so does the concentration of hyaluronic acid, resulting in less hydrated skin.

These changes can leave your skin more prone to dryness, irritation, and wrinkles during perimenopause. Fortunately, establishing a consistent nightly skincare routine can counteract these effects and help restore your skin’s radiance and softness. Here’s a straightforward routine to get you started.

Cleansing

Start your nightly skincare routine with a gentle cleanser. This is crucial for removing the day’s accumulation of dirt, oil, and makeup, which can exacerbate skin dryness and irritation if left overnight. Choose a hydrating cleanser that is free from harsh sulfates to ensure it cleans without stripping the skin of its essential natural oils. Gentle, creamy, or oil-based cleansers are excellent choices as they effectively cleanse while also contributing additional moisture to the skin.

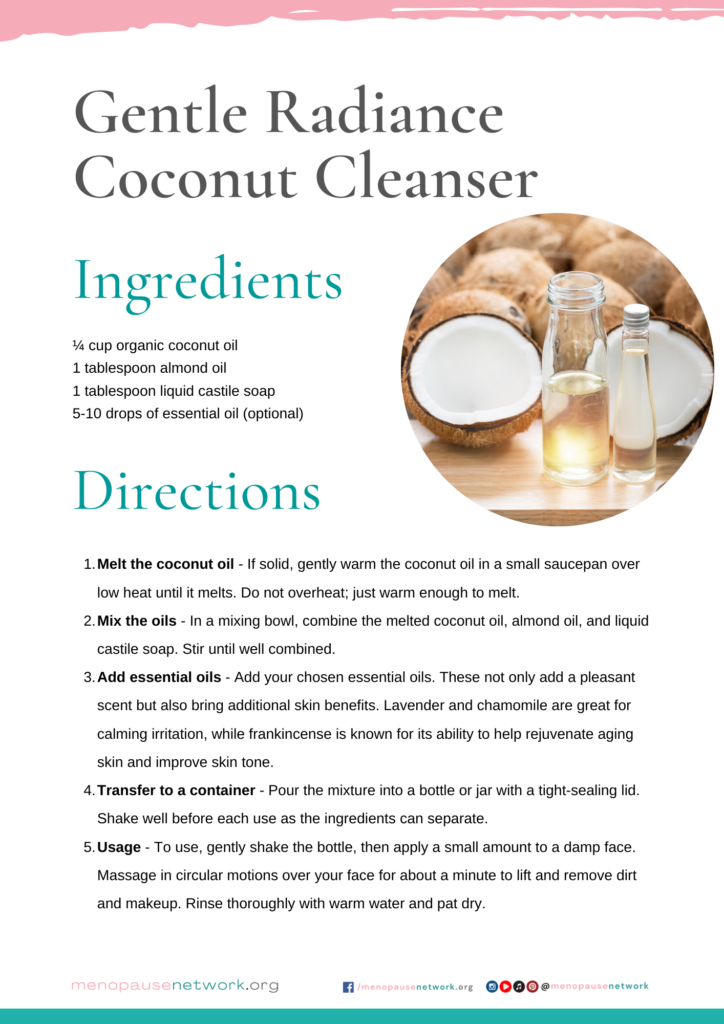
Creating a DIY cleanser is a great way to ensure your skincare is natural and tailored to your specific needs, especially during perimenopause when your skin requires extra care.

Here’s a simple recipe for a homemade cleanser that can help combat dry skin and wrinkles:

About the Ingredients

  • Coconut oil – Rich in fatty acids, it’s excellent for moisturizing and has antibacterial properties
  • Almond oil – Packed with vitamin E, almond oil nourishes and softens the skin, reducing the appearance of aging.
  • Castile soap – A gentle, natural soap that cleans without stripping natural oils.
  • Essential oil (optional) – Lavender or chamomile for soothing properties, or frankincense for its anti-aging benefits.

Tips:

  • Always perform a patch test with homemade products to ensure you do not have a reaction to any ingredients.
  • Store your DIY cleanser in a cool, dry place, and consider making small batches to maintain freshness, as homemade products do not contain preservatives.
  • This cleanser is especially good in cooler months or for those with naturally dry or mature skin, given its moisturizing properties.

This DIY cleanser provides a gentle yet effective solution to cleanse your skin, providing hydration and tackling signs of aging without harsh chemicals.

Toning

After cleansing, apply a hydrating toner. This step is essential for several reasons. First, it helps to rebalance the skin’s pH levels, which can be disrupted after cleansing. A balanced pH protects the skin from bacteria and pollution. Secondly, toners can enhance the skin’s surface, allowing it to better absorb the subsequent skincare products. Opt for alcohol-free toners with soothing ingredients like aloe vera, chamomile, or cucumber, which provide hydration without irritation.

Moisturizing

The final step in your nightly routine should be to apply a rich, emollient moisturizer. Night creams are typically denser and more hydrating than day creams and are formulated to support skin repair during sleep. Ingredients like hyaluronic acid, glycerin, and ceramides are particularly beneficial as they not only lock in moisture but also help to strengthen the skin’s barrier function. This reinforcement is vital during perimenopause when the skin’s natural barrier is weakening due to hormonal changes. These ingredients collectively work overnight to deeply hydrate, plump up the skin, and reduce the appearance of fine lines and wrinkles, leaving the skin more resilient and smooth.

Targeted Treatments

Incorporate products with retinoids, peptides, or antioxidants like Vitamin C or E. These can help combat the signs of aging by promoting cell turnover and fighting free radical damage.

3. Embrace Overnight Hydration Masks

An overnight hydration mask can be a game-changer for dry, perimenopausal skin. These masks are designed to deeply hydrate and nourish the skin while you sleep, leveraging the body’s natural reparative processes. Ingredients like aloe vera, algae extracts, or shea butter can provide an extra hydration boost.

4. Humidify Your Bedroom

Maintaining moisture in your bedroom environment can also help combat skin dryness. A cool-mist humidifier adds moisture to the air, which can prevent your skin from becoming too dry, especially in colder months or in air-conditioned rooms.

5. Prioritize Sleep Quality

Sleep is not just a beauty ritual; it’s a necessity for overall health, particularly during perimenopause. Lack of sleep can lead to increased cortisol levels, which may exacerbate skin dryness and aging. Aim for 7-9 hours of quality sleep per night, and try to maintain a consistent sleep schedule.

Tips for Better Sleep:

  • Keep electronic devices out of the bedroom to avoid blue light exposure.
  • Invest in comfortable bedding and pillows to support a good night’s sleep.
  • Consider relaxation techniques like meditation or reading a book before bed.

6. Check Your Diet

What you eat can also impact your skin health. Foods rich in omega-3 fatty acids, like salmon and flaxseeds, can help maintain your skin’s oil production and hydration levels. Additionally, stay hydrated by drinking plenty of water throughout the day.

7. Consult with a Dermatologist

If you find your skin issues are difficult to manage, consult with a dermatologist. They can offer treatments such as hormone replacement therapy (HRT) or specific skincare products that cater to hormonal skin changes.

By implementing these nightly rituals and taking care of your overall health, you can significantly improve the condition of your skin during perimenopause. Remember, each woman’s skin will react differently during this transition, so it’s important to listen to your body and adjust your skincare routine accordingly. Here’s to waking up with more radiant and rejuvenated skin!

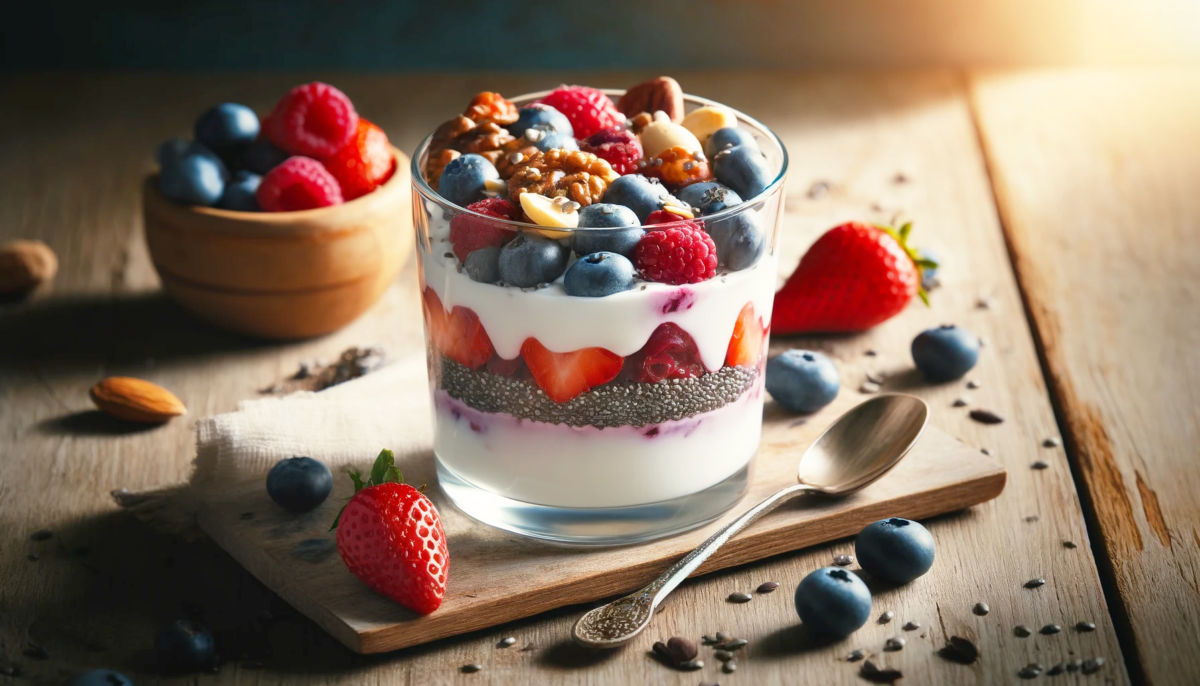
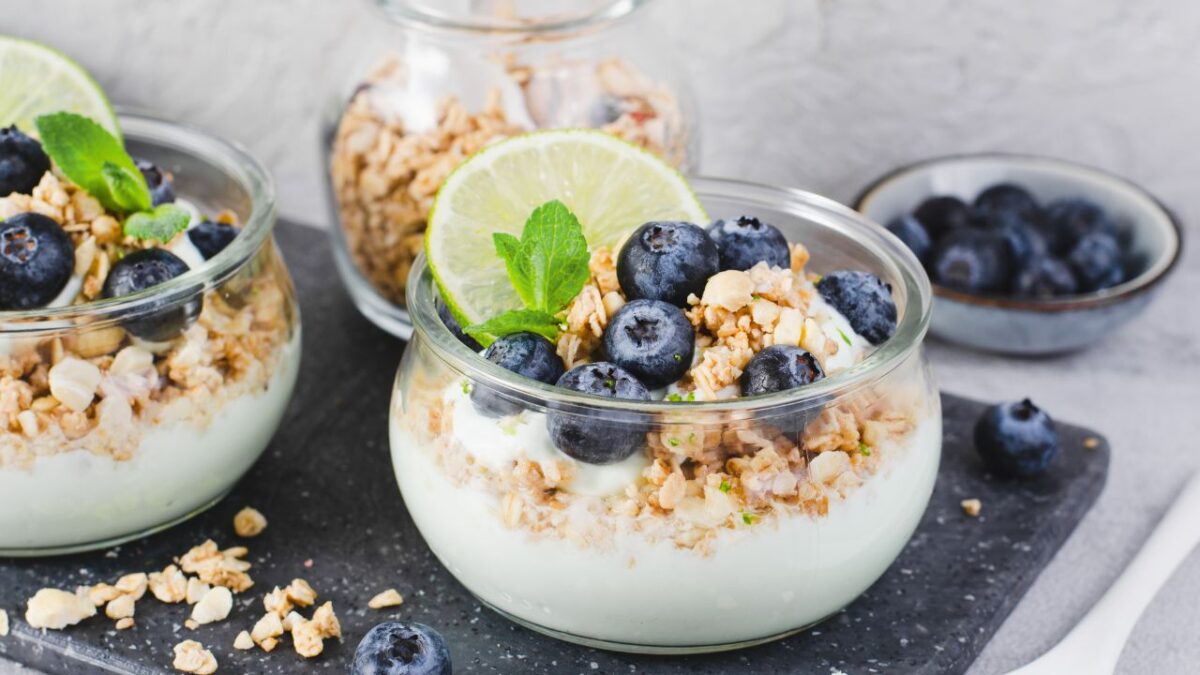
Greek Yogurt Parfait with Mixed Berries and Nuts

For menopausal women, it’s great to focus on a breakfast that balances nutrients, supports hormonal health, and provides sustained energy. A good option would be a Greek Yogurt Parfait with Mixed Berries and Nuts. This meal is rich in protein, fiber, and antioxidants, which are beneficial during menopause for supporting bone health and reducing hot flashes.

Here’s how you can make it:

Nutritional Facts (Approximate Per Serving)

  • Calories: 350
  • Protein: 20 g
  • Carbohydrates: 25 g
  • Fiber: 6 g
  • Fat: 18 g
  • Sugar: 12 g (natural sugars from berries and optional honey)
  • Cholesterol: 10 mg
  • Sodium: 60 mg

Ingredients:

  • 1 cup Greek yogurt (preferably unsweetened)
  • 1/2 cup mixed berries (strawberries, blueberries, raspberries)
  • 1/4 cup mixed nuts (almonds, walnuts, pecans), roughly chopped
  • 1 tablespoon chia seeds
  • 1 teaspoon honey or maple syrup (optional)
  • A sprinkle of ground flaxseeds (for extra fiber and omega-3)

Instructions:

  1. Layer the Yogurt: Start by placing half of the Greek yogurt at the bottom of a glass or bowl.
  2. Add Berries: Layer half of the mixed berries over the yogurt.
  3. Sprinkle Nuts and Seeds: Add half of the nuts and a sprinkle of chia seeds and ground flaxseeds.
  4. Repeat Layers: Repeat the layering with the remaining yogurt, berries, nuts, and seeds.
  5. Drizzle Sweetener: If desired, drizzle with honey or maple syrup for a touch of sweetness.
  6. Serve: Enjoy immediately for a fresh, nutritious breakfast.

Benefits

  1. Greek Yogurt:
    • High in Protein: Supports muscle repair and growth.
    • Rich in Probiotics: Helps maintain a healthy gut microbiota.
    • Calcium and Vitamin D: Supports bone health, which is particularly important during menopause when bone density can decrease.
  2. Mixed Berries (Strawberries, Blueberries, Raspberries):
    • Antioxidants: Help combat oxidative stress and inflammation.
    • Vitamins C and E: Support skin health and immune function.
    • Fiber: Promotes digestive health and helps maintain a feeling of fullness.
  3. Mixed Nuts (Almonds, Walnuts, Pecans):
    • Healthy Fats: Primarily monounsaturated and polyunsaturated fats that are good for heart health.
    • Vitamin E and Magnesium: Important for skin health and metabolic function.
    • Protein and Fiber: Aid in maintaining muscle mass and digestive health.
  4. Chia Seeds:
    • Omega-3 Fatty Acids: Anti-inflammatory properties which are beneficial for cardiovascular health.
    • Fiber: Helps in maintaining blood sugar levels and promotes satiety.
    • Calcium: Important for bone health.
  5. Ground Flaxseeds:
    • Lignans: Have estrogenic properties that can be beneficial in balancing hormones during menopause.
    • Omega-3 Fatty Acids: Support cardiovascular health.
    • Fiber: Aids in digestion and cholesterol management.
  6. Honey (Optional):
    • Natural Sweetener: Provides energy and contains trace enzymes, minerals, and vitamins.
    • Antibacterial Properties: Can support immune health.

This Greek Yogurt Parfait offers a harmonious blend of macro and micronutrients, making it a superb choice for a nutritious breakfast or a refreshing snack. Specifically designed to cater to health concerns associated with menopause, each ingredient contributes beneficial properties that enhance overall wellness. This breakfast is not only quick to assemble but can also be prepared ahead of time. It is highly customizable, allowing you to incorporate your favorite fruits and nuts to suit your taste.

Feel inspired to try this delicious and healthful parfait! It’s perfect for starting your day with a nutrient-dense meal that supports hormonal balance during menopause. Gather your preferred berries, nuts, and yogurt, and enjoy creating a visually appealing and tasty layer of goodness. Don’t hesitate to experiment with this recipe and share your unique version. Let’s embrace healthy eating together and make it both enjoyable and beneficial!

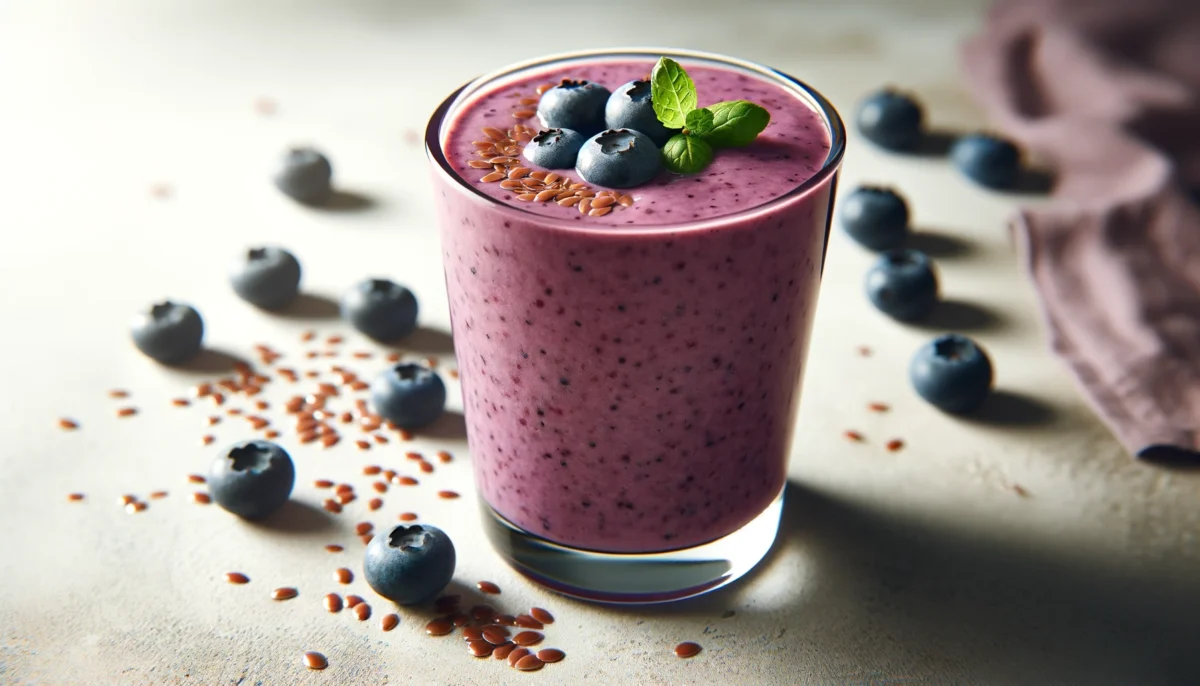
Beat the Heat: The Ultimate Chilled Flaxseed & Blueberry Smoothie for Instant Menopause Relief!

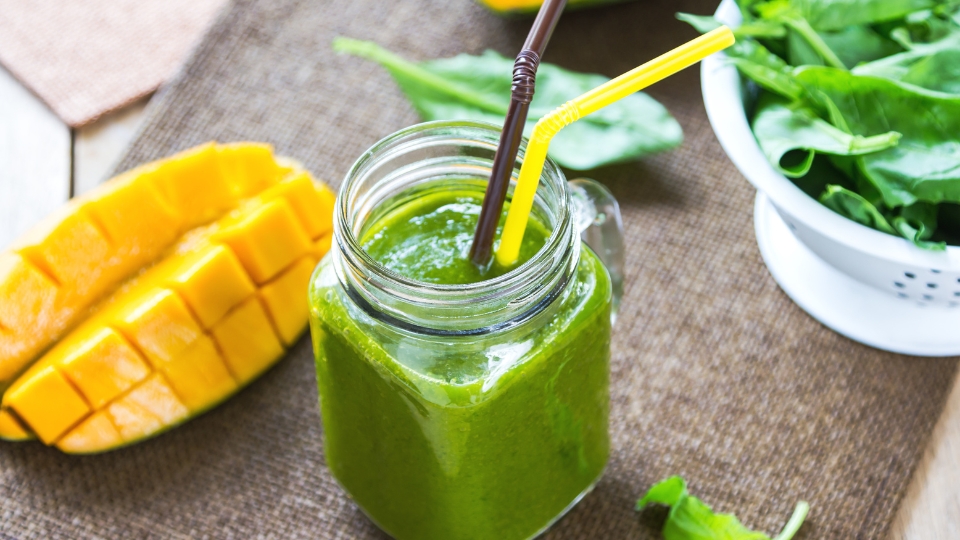
This smoothie is designed to be both cooling and nourishing, with a focus on ingredients that can support hormonal balance and provide a refreshing relief from hot flashes. Enjoy this as part of your morning routine or as a soothing afternoon snack.

Chilled Flaxseed & Blueberry Smoothie

Serves two.

Ingredients:

  • 1 cup of chilled almond milk (unsweetened)
  • 1/2 cup of fresh or frozen blueberries
  • 1 tablespoon of ground flaxseed
  • 1/2 banana, sliced and frozen
  • A handful of spinach leaves
  • A few mint leaves (optional for extra freshness)
  • Ice cubes (optional, for a colder smoothie)

Instructions:

  1. Prep: Ensure all ingredients are washed (for those that apply) and ready. The banana should be pre-sliced and frozen.
  2. Blend: In a blender, combine the almond milk, blueberries, ground flaxseed, frozen banana slices, spinach, and mint leaves. Blend until smooth. If you prefer a colder smoothie, add a few ice cubes and blend again.
  3. Serve: Pour the smoothie into a glass and enjoy immediately for the best taste and cooling effect.

Why This Recipe?

  • Flaxseed: Rich in phytoestrogens, particularly lignans, which can help balance hormones. They are also a great source of omega-3 fatty acids.
  • Blueberries: Packed with antioxidants and vitamins that support overall health.
  • Almond Milk: A dairy-free alternative that’s gentle on the digestive system and provides essential vitamins and minerals.
  • Spinach: A nutrient-dense leafy green, providing a good source of magnesium, which may help improve sleep quality.
  • Banana: Adds natural sweetness, along with potassium and magnesium, contributing to overall hydration and electrolyte balance.
  • Mint: Known for its cooling properties, mint can add a fresh flavor and potentially aid in digestion.

Nutritional Information:

  • Calories: Approx. 200 kcal per serving
  • Protein: 5g
  • Fiber: 4g
  • Fat: 4g (primarily from flaxseed, containing healthy fats)

As a bonus, here’s a concise and easy-to-use grocery list tailored for the Chilled Flaxseed & Blueberry Smoothie recipe. It includes all the necessary ingredients, with package sizes calculated for making approximately 2 servings of the smoothie.

Grocery List:

  1. Almond Milk (Unsweetened): 1 carton (at least 16 oz. or 473 ml)
  2. Fresh or Frozen Blueberries: 1 package (at least 8 oz. or 227 g)
  3. Ground Flaxseed: 1 bag (8 oz. or 227 g) – You’ll need just 2 tablespoons for this recipe, but ground flaxseed is a versatile ingredient that can be used in various dishes.
  4. Bananas: 1 bunch – You’ll need 1 banana for 2 servings, but they’re always good to have on hand for snacking or other recipes.
  5. Fresh Spinach Leaves: 1 bag (5 oz. or 142 g) – This will be more than enough for the smoothie and can be used in salads or other dishes.
  6. Fresh Mint Leaves (Optional): 1 small bunch – If you enjoy the freshness of mint, it can also be used in teas or as a garnish.

Shopping Tips:

  • For blueberries, consider buying frozen if fresh ones aren’t in season; they’re equally nutritious and often more economical.
  • Ground flaxseed should be stored in a cool, dark place (or even refrigerated) to maintain its nutritional benefits.
  • When selecting almond milk, look for unsweetened varieties to avoid added sugars.
  • Bananas can be bought slightly green if you don’t plan on making the smoothie immediately; they’ll ripen over a few days.
  • Spinach is available both fresh and pre-washed in bags, making it convenient for quick use without the need for additional cleaning.

This list is designed to make your shopping trip efficient and ensure you have all you need for a refreshing, menopause-friendly smoothie. Enjoy!

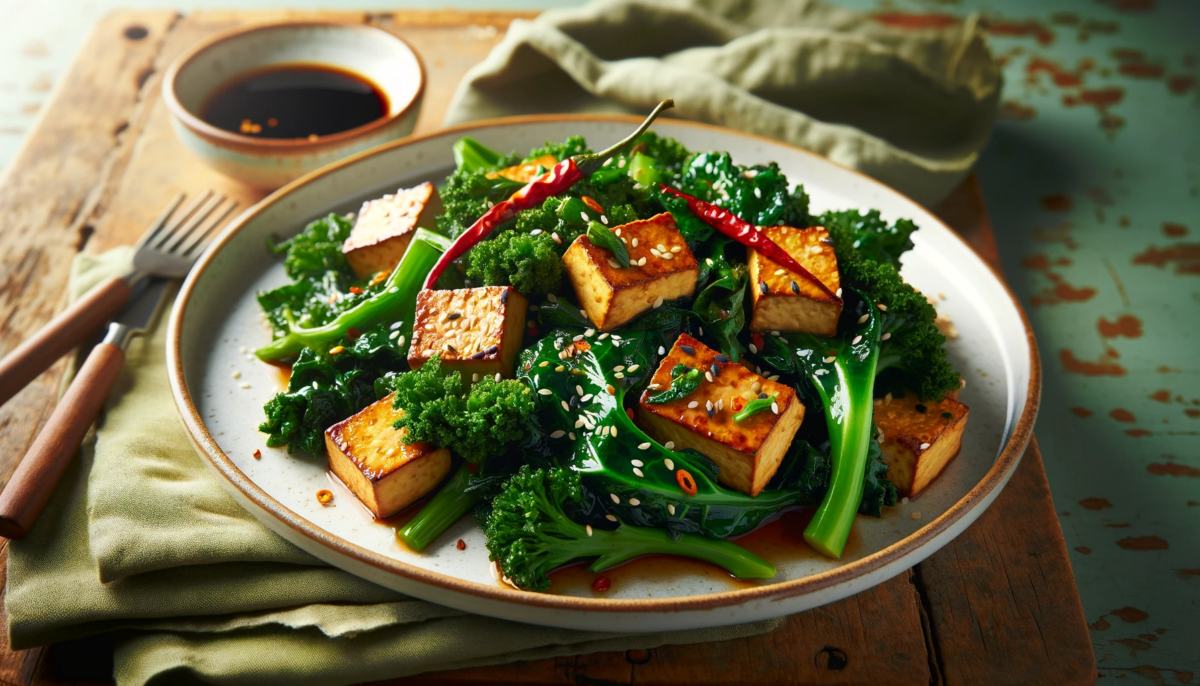
Stir-fried Tofu and Kale for Two

Stir-fried Tofu and Kale is not just a treat to the taste buds but also packed with nutrients beneficial for menopausal women, like calcium and phytoestrogens from tofu, and vitamins from kale. Here’s a tailored version for two, ensuring it’s both satisfying and suitable for your dietary preferences:

Ingredients:

  • 200g (about 7 oz) firm tofu, pressed and cubed
  • 200g (about 7 cups) kale, chopped
  • 2 tablespoons olive oil
  • 2 cloves garlic, minced
  • 1 tablespoon soy sauce (or tamari for gluten-free)
  • 1 teaspoon sesame oil
  • 1 tablespoon sesame seeds
  • Salt and pepper to taste
  • Optional: chili flakes for a bit of heat

Instructions:

  1. Heat 1 tablespoon of olive oil in a large pan over medium heat. Add the cubed tofu and cook until golden brown on all sides. Remove from the pan and set aside.
  2. In the same pan, add the remaining olive oil and garlic, sautéing for about 1 minute until fragrant.
  3. Add the kale and stir-fry until it starts to wilt.
  4. Return the tofu to the pan. Add soy sauce, sesame oil, and sesame seeds. Stir well to combine.
  5. Season with salt, pepper, and optional chili flakes. Serve hot.

This dish is a powerhouse of nutrients, perfect for supporting overall well-being during menopause. Here’s your visual feast: a vibrant and colorful plate of stir-fried tofu and kale, sprinkled with sesame seeds and just a hint of chili flakes for those who like a bit of a kick. It’s not just a treat for the eyes, but it’s also packed with the goodness your body craves.

stir fried tofu with kale set in a rustic background

Nutrition Facts:

  • Calories: Approximately 250 per serving.
  • Protein: Tofu brings in high-quality plant protein, crucial for muscle maintenance, about 15g per serving.
  • Fats: Mostly unsaturated from olive oil and sesame oil, around 15g per serving, supporting heart health.
  • Carbohydrates: Primarily from veggies, offering about 10g per serving, keeping this dish low in carbs yet high in fiber.
  • Fiber: Kale is a fiber superstar, contributing to digestive health, with about 5g per serving.
  • Calcium: Both tofu and kale are excellent sources of calcium, essential for bone health, providing about 30% of the daily value per serving.
  • Iron: Tofu and kale again come to the rescue, offering about 15% of the daily value per serving, supporting blood health.

This dish is a well-rounded, nutrient-dense meal that not only satisfies your taste buds but also supports your body through menopause with essential vitamins and minerals. Ready to give this recipe a whirl, or would you like to explore more options? Comment down below!!

Snack Smart: Quick Bites to Balance Hormones During Menopause

Snacks for menopausal women aren’t just about satisfying those hunger pangs; they’re like a secret code to unlock hormonal harmony. During menopause, our bodies transform into intricate, ever-changing ecosystems, especially in the world of hormones. These little guys are the conductors of our mood, energy, and overall wellbeing. And the food we choose? It’s like the perfect melody that keeps these hormonal symphonies in harmony. So, when we talk about snacking smart, it’s not just about quelling hunger – it’s about lovingly guiding our hormones to a place of balance and joy.

So, why are these snacks such a game-changer for menopausal women? Well, as we wave goodbye to our regular menstrual cycles, our bodies start to change the way they deal with hormones like estrogen and progesterone. This can bring a whole carnival of symptoms – hot flashes, anyone? Mood swings? Suddenly, our usual go-to snacks might not cut it anymore. We need something that’s not just tasty, but also kind to our hormones.

This is where our super-snacks swing into action! They’re not your average nibbles; they’re packed with ingredients that have a rep for being awesome at helping balance hormonal fluctuations. Think of them as little helpers, smoothing out the ups and downs of menopause, one bite at a time. From phytoestrogens in soy that mimic estrogen, to omega-3s in nuts that show our heart some love – these snacks are like a hug for your hormones.

And the best part? They’re super easy to whip up. No need to be a master chef here – simple, quick, and utterly delicious is our mantra. So, are you ready to snack your way to hormonal harmony? Let’s dive into these tasty, hormone-friendly bites that are about to make your menopausal journey a whole lot smoother!

Snack Ideas and Recipes

1. Soy-based Snack: Edamame

  • Recipe: Let’s keep it simple yet delicious. Boil or steam shelled edamame until they’re tender, which usually takes about 5 minutes. Then, sprinkle a pinch of sea salt over them for that perfect balance of earthiness and saltiness. You can even add a dash of chili flakes or a squeeze of lemon for an extra zing!
  • Benefits: Edamame is a superstar in the snack world for menopausal women. It’s packed with phytoestrogens, natural compounds that mimic estrogen in the body. This is super helpful because, during menopause, your body’s estrogen levels are on a rollercoaster. By munching on these little green gems, you’re helping smooth out those hormonal bumps, potentially easing symptoms like hot flashes and mood swings. Plus, they’re a great source of protein and fiber – talk about a nutritional powerhouse!

2. Seeds and Nuts Mix: Flaxseed and Pumpkin Seeds

  • Recipe: This is a crunchy delight that’s both satisfying and easy to make. Take equal parts of ground flaxseed and pumpkin seeds, and mix them together. Store this blend in an airtight container, and you’ve got a ready-to-go snack. You can sprinkle it over salads, yogurt, or just enjoy it by the handful.
  • Benefits: Here’s the scoop – flaxseeds and pumpkin seeds are like little nuggets of hormonal harmony. Flaxseeds are rich in lignans, which have estrogenic properties, helping to balance hormones. They’re also a fantastic source of omega-3 fatty acids, which are great for heart health – a big plus during menopause. Pumpkin seeds, on the other hand, are packed with magnesium, known for its mood-stabilizing powers. Together, they’re a dynamic duo for maintaining hormonal balance and keeping your heart healthy.

3. Fruit-based Snack: Berry and Yogurt Parfait

  • Recipe: This one’s as pretty as it is tasty. In a glass or bowl, layer Greek yogurt with a variety of fresh berries like strawberries, blueberries, and raspberries. Drizzle a little honey on top for a touch of sweetness. For an added crunch, throw in some granola or chopped nuts.
  • Benefits: Berries are little jewels loaded with antioxidants and essential vitamins, making them perfect for combating oxidative stress and inflammation – common issues during menopause. Greek yogurt is a fantastic source of calcium, vital for maintaining bone health, which becomes increasingly important as estrogen levels drop. This snack is not just a feast for the eyes; it’s a boon for your bones and overall health.

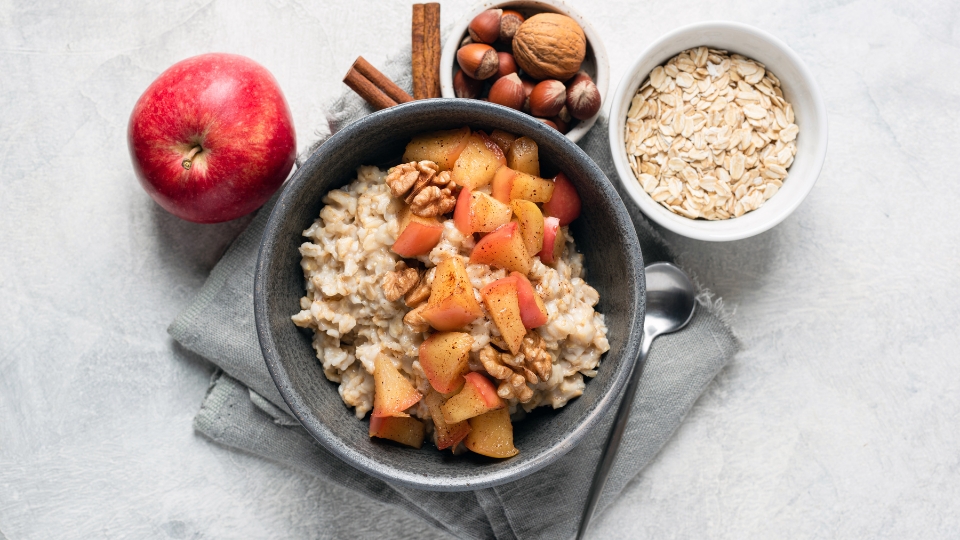
4. Whole Grains Snack: Oatmeal with Almond Milk

  • Recipe: Start your day or enjoy a hearty snack with this one. Cook oats in almond milk until they’re soft and creamy. Top it with your favorite fruits like sliced bananas, apples, or even a handful of berries. For some added sweetness and flavor, sprinkle cinnamon or a dash of vanilla extract.
  • Benefits: Oats are a fantastic source of fiber, which is essential for good digestive health – something that can be a bit haywire during menopause. The fiber in oats also helps in maintaining a healthy heart and balanced blood sugar levels. Almond milk is a great dairy alternative, rich in healthy fats and often fortified with vitamins, making this snack not just hormone-friendly but also incredibly nourishing.

Alright, fabulous ladies, that’s a wrap on our snack-time adventure! Remember, menopause might feel like a wild ride at times, but your snack game can totally be on point to help smooth out those hormonal waves. Whether you’re crunching on edamame, savoring a seed mix, indulging in a berry parfait, or cozying up with a bowl of oatmeal, these snacks are more than just tasty treats. They’re your allies in this journey, packed with all the good stuff to keep your hormones feeling harmonious and your body feeling fabulous.

Feel free to tweak these recipes to suit your taste buds and needs. And hey, why not get creative and come up with your own hormone-friendly snacks? The key is to enjoy what you eat and listen to your body – it’s always trying to tell you something.

Here’s to happy snacking and thriving through menopause! You’ve got this, ladies!

Menopause and Immunity: How Bone Broth Can Ward Off Winter Colds

Ever noticed how colds seem to sneak up on us more during the winter? It’s not the chilly weather itself that’s the culprit – colds come from viruses and bacteria. But here’s the thing: in winter, we all love to stay indoors, cozy and warm. This means we’re closer together, making it a breeze for germs to hop from one person to another. That’s why it feels like everyone’s sniffling when the temperature drops!

Now, for women going through menopause, this can be a bit trickier. Menopause brings a whole lot of changes, and one of them can be a dip in your immune system’s mojo. So, staying healthy and keeping those germs at bay becomes even more important.

And speaking of staying healthy, let’s talk about chicken soup. Is it really a cold-fighting superhero? Absolutely! Sipping any hot liquid is comforting, but chicken soup has some real science behind it. It’s all about helping your white blood cells – your body’s infection-fighting champions – work better together. This is super helpful when your body is trying to fend off those pesky cold germs.

But wait, there’s more! Have you heard about the wonders of bone broth? This is not just any old broth; it’s a powerhouse for your immune system, especially helpful for women in menopause. Bone broth is packed with nutrients that can give your immune system a big boost, helping it fight off colds more effectively. Plus, it’s super easy to make and can be a comforting, warming addition to your diet.

Here’s a simple and nourishing bone broth recipe that you can make at home:

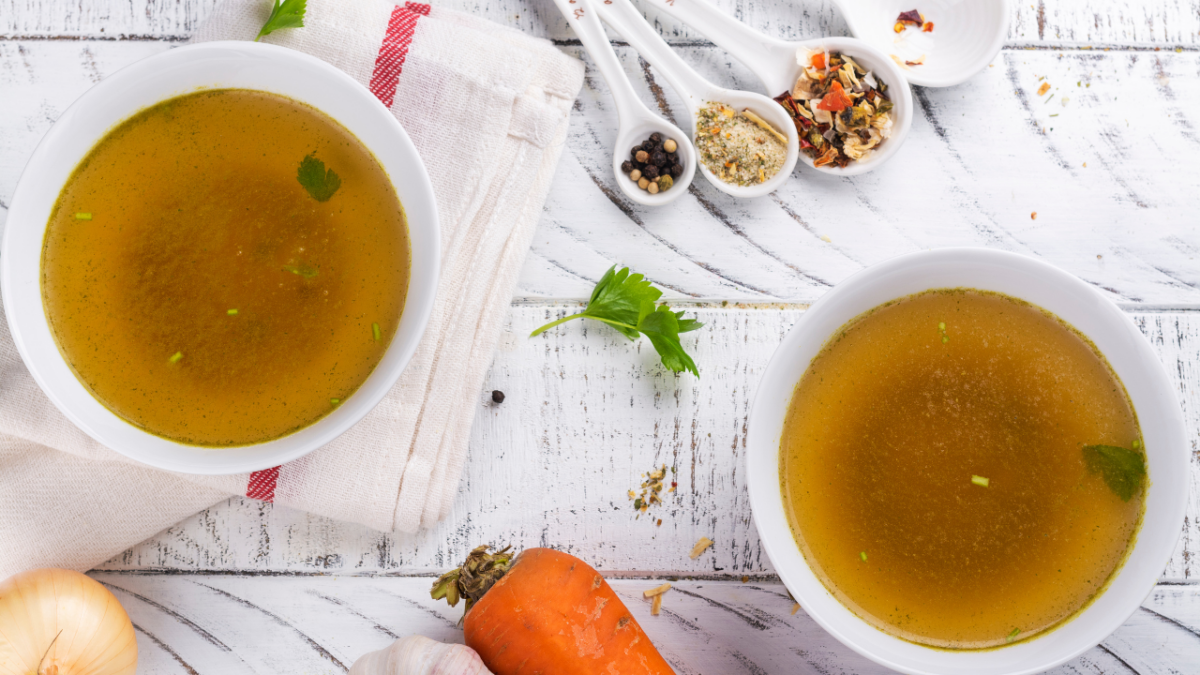
Bone Broth Recipe

chicken bone broth

Ingredients:

  • 2 kg of mixed bones (beef, chicken, or turkey, preferably including some marrow bones)
  • 2 carrots, roughly chopped
  • 1 onion, quartered (no need to peel)
  • 4 cloves of garlic, smashed (no need to peel)
  • 2 celery stalks, roughly chopped
  • 2 bay leaves
  • A small bunch of fresh parsley
  • 1 teaspoon whole peppercorns
  • 2 tablespoons apple cider vinegar
  • Water to cover

Instructions:

  1. Preparation of Bones: If using beef bones, consider roasting them first. Preheat your oven to 200°C (400°F), place the bones on a baking sheet, and roast for 30 minutes. This step is optional but adds depth to the flavor.
  2. Assembling Ingredients: In a large stockpot or slow cooker, place the roasted (or unroasted) bones. Add the carrots, onion, garlic, celery, bay leaves, parsley, and peppercorns.
  3. Adding Vinegar: Pour in the apple cider vinegar. This helps in extracting nutrients from the bones.
  4. Covering with Water: Add enough water to cover all the ingredients. The water should be just enough to cover the bones and vegetables.
  5. Slow Cooking: Bring the mixture to a gentle boil, then reduce the heat to a simmer. For a richer broth, simmer for 24-48 hours for beef bones or 12-24 hours for chicken or turkey bones. Skim off any foam or impurities that rise to the top.
  6. Straining: After simmering, strain the broth through a fine-mesh sieve to remove all the solids, leaving a clear broth.
  7. Cooling and Storing: Allow the broth to cool. You can skim off the fat that solidifies on the top if desired. Store the broth in the refrigerator for up to 5 days, or freeze it in smaller portions for longer storage.

Serving Suggestions: Use this bone broth as a base for soups and stews, or drink it warm seasoned with a bit of salt. It’s not only delicious but also packed with nutrients beneficial for joint health, digestion, and overall wellness. So, next time you’re feeling a bit under the weather or just want to give your body some extra love, whip up some bone broth. Your immune system will thank you!


Navigating the changes that come with menopause doesn’t have to be a daunting journey. By embracing nourishing foods like bone broth and other immune-boosting soups, women can significantly enhance their overall well-being. These soups not only offer comfort and warmth but also pack a powerful punch of nutrients essential for maintaining a strong immune system. Especially during the colder months, when colds and flu are more prevalent, incorporating these wholesome recipes into your diet can be a game-changer. They are more than just meals; they are a form of self-care, providing the body with the necessary tools to fight off infections and stay healthy. So, whether you’re in the midst of menopause or supporting someone who is, remember that a bowl of nutritious soup can be a simple yet effective way to uplift health and spirits. Embrace these recipes as part of your menopause wellness plan and enjoy the comforting, healing powers they bring to your table.

Free Download: 4-Week Menopause Friendly Meal Plan

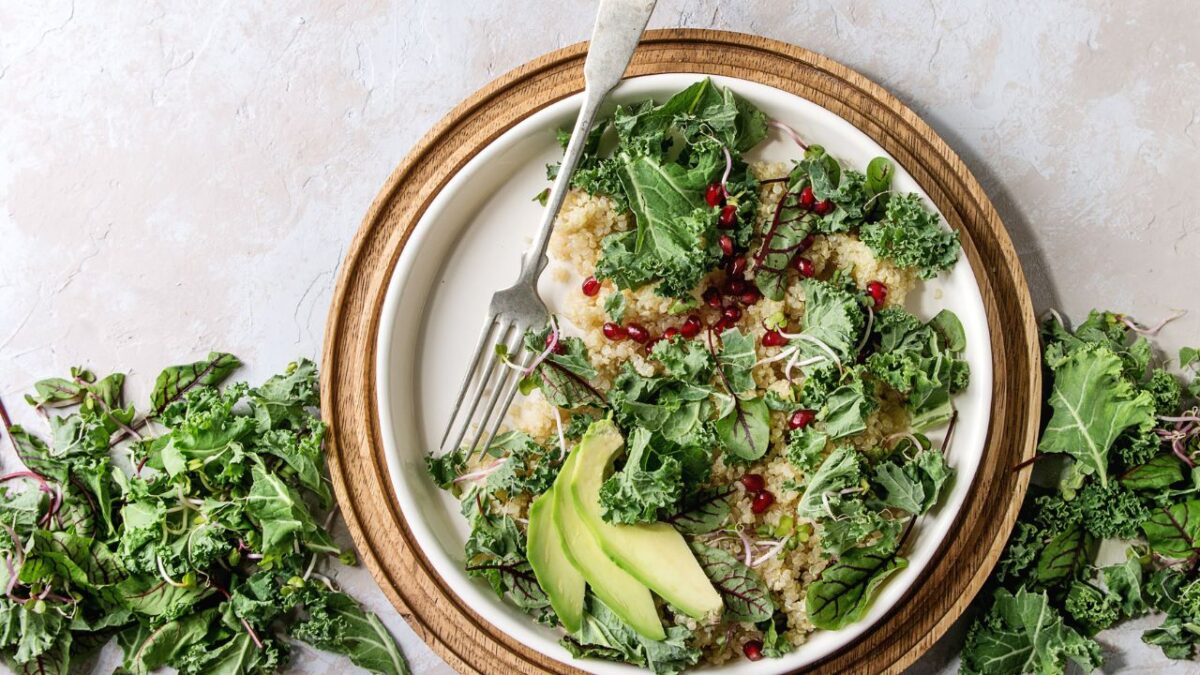
Quinoa and Kale Salad with Flaxseeds For Your Menopause Diet

Embarking on a menopause diet journey can be transformative, especially when you incorporate nutrient-rich meals like the Quinoa and Kale Salad with Flaxseeds. This dish isn’t just a delight for your taste buds; it’s a powerhouse of ingredients that align perfectly with the nutritional needs of a menopause diet.

Menopause brings significant changes to a woman’s body, including altered metabolism and hormonal imbalances. It’s crucial to focus on foods that not only nourish but also help in managing these changes. The Quinoa and Kale Salad with Flaxseeds is a perfect example of how you can turn simple ingredients into a menopause diet staple.

Quinoa, the star of this salad, is a complete protein, packed with all nine essential amino acids. It’s also high in fiber, which is excellent for digestive health and can help in maintaining a healthy weight – a common concern during menopause. Kale, another key ingredient, is loaded with nutrients like calcium, crucial for bone health as estrogen levels drop. The addition of flaxseeds brings in omega-3 fatty acids, known for their anti-inflammatory properties and potential to alleviate menopause symptoms like hot flashes.

This salad isn’t just about what it contains; it’s also about what it lacks. Free from processed ingredients and high in natural, whole foods, it’s perfectly in sync with a menopause diet aimed at reducing processed and high-sugar foods. Every bite of this Quinoa and Kale Salad with Flaxseeds is a step towards balancing your menopause diet with deliciousness and nutrition.

Quinoa and Kale Salad with Flaxseeds

  • Main Ingredients
    • 1 cup quinoa
    • 2 cups water
    • 2 cups chopped kale
    • 1/2 cup diced red bell pepper
    • 1/4 cup chopped red onion
    • 1/4 cup toasted almond slivers
    • 2 tablespoons flaxseeds
    • 1/4 cup dried cranberries
  • For the Dressing:
    • 3 tablespoons olive oil
    • 2 tablespoons apple cider vinegar
    • 1 tablespoon honey (or maple syrup for a vegan option)
    • Salt and pepper to taste

Instructions:

Quinoa
  1. Cook the Quinoa: Rinse the quinoa under cold water. In a saucepan, bring 2 cups of water to a boil. Add the quinoa, reduce heat to low, cover, and simmer for about 15 minutes or until the quinoa is cooked and the water is absorbed. Let it cool.
  2. Prepare the Kale: While the quinoa is cooking, wash and chop the kale. To soften it, you can massage the kale with a little olive oil.
  3. Toast the Almonds: In a dry skillet over medium heat, toast the almond slivers until they’re golden brown. Be careful to avoid burning them.
  4. Make the Dressing: In a small bowl, whisk together olive oil, apple cider vinegar, honey, salt, and pepper.
  5. Combine the Salad: In a large bowl, combine the cooled quinoa, kale, red bell pepper, red onion, toasted almonds, flaxseeds, and dried cranberries.
  6. Add the Dressing: Pour the dressing over the salad and toss everything together until well mixed.
  7. Serve: You can serve this salad immediately or let it sit in the refrigerator for an hour to allow the flavors to meld together.

Nutritional Benefits:

Kale
  • Quinoa: A great source of protein and fiber.
  • Kale: High in vitamins A, C, and K, and calcium.
  • Flaxseeds: Rich in omega-3 fatty acids and lignans, which can help in managing menopause symptoms.
  • Almonds: Provide healthy fats, fiber, and protein.
  • Cranberries: Add a hint of sweetness and are a good source of antioxidants.

Menopause often means dealing with a slower metabolism, weaker bones, and a higher chance of heart issues. Plus, it’s no secret that it can bring some pretty uncomfortable stuff like hot flashes and trouble sleeping.

Eating lots of fruits, veggies, whole grains, top-notch proteins, and dairy can really help ease those menopause symptoms. Including foods with calcium, phytoestrogens and good fats, like the omega-3s you get from fish, is also a smart move.

This recipe is not only nutritious but also versatile. You can add other ingredients like avocado, cucumber, or chickpeas for added nutrients and flavors. Remember, individual dietary needs can vary, so it’s always good to consult with a healthcare provider or dietitian when making significant changes to your diet.

Tip: It’s a good idea to cut back on the sweet stuff, those super processed carbs, booze, caffeine, and salty foods too. Tweaking your diet like this can really smooth out the bumps of this major life change.


Free Download: 4-Week Menopause Friendly Meal Plan

Fenugreek and Lentil Soup Delight

This Fenugreek and Lentil Soup Delight is one of our easy recipes for menopause. This soup is designed with menopausal women in mind, as it includes fenugreek, which is known for its potential benefits in alleviating some menopausal symptoms. Fenugreek contains phytoestrogens, which are plant compounds that can mimic the hormone estrogen in the body, helping to balance hormonal fluctuations that occur during menopause. You can read more about the benefits of fenugreek to menopausal women here.

Moreover, this recipe is easy to prepare, making it a practical choice for women going through menopause who may not have the energy or time for complicated cooking. With a relatively short prep time of just 10 minutes and a total cooking time of 30 minutes, it’s a convenient and nutritious option for those looking to incorporate menopause-friendly foods into their diet.

The combination of red lentils, rich in protein and fiber, with the warming and aromatic spices like cumin, coriander, and ginger, creates a comforting and flavorful soup that can provide both physical and emotional comfort during this transformative phase of life. By enjoying dishes like this Fenugreek and Lentil Soup Delight, women can take a proactive approach to managing their menopausal symptoms while enjoying a delicious and nourishing meal.

Try this recipe and let us know what you think!

Fenugreek and Lentil Soup Delight

Serving SizePrep TimeCook TimeTotal TimeDifficulty
4 servings10 mins30 mins40 minsEasy
Menopause Comfort Soup: Fenugreek and Lentil Delight

Ingredients:

1 cup dried red lentils, rinsed and drained
1 tablespoon fenugreek seeds
1 small onion, finely chopped
2 cloves garlic, minced
1 carrot, diced
1 celery stalk, diced
1 teaspoon ground cumin
1/2 teaspoon ground coriander
1/2 teaspoon turmeric powder
1/4 teaspoon ground ginger
4 cups vegetable broth
2 cups water
Salt and pepper to taste
2 tablespoons olive oil
Fresh cilantro or parsley for garnish (optional)

Instructions:

  1. Heat the olive oil in a large pot over medium heat. Add the fenugreek seeds and sauté for a minute or until they start to release their aroma.
  2. Add the chopped onion, garlic, carrot, and celery to the pot. Sauté for about 5 minutes until the vegetables become tender.
  3. Stir in the ground cumin, ground coriander, turmeric, and ground ginger. Cook for another 2 minutes to toast the spices.
  4. Add the rinsed red lentils to the pot and stir to combine with the vegetables and spices.
  5. Pour in the vegetable broth and water. Bring the mixture to a boil, then reduce the heat to low, cover, and simmer for about 20-25 minutes, or until the lentils are soft and fully cooked.
  6. Season the soup with salt and pepper to taste. Adjust the seasonings as needed.
  7. Use an immersion blender to blend the soup until it reaches your desired consistency. If you don’t have an immersion blender, you can transfer the soup in batches to a regular blender, blend, and then return it to the pot.
  8. Taste the soup and adjust the seasoning if necessary.
  9. Serve the fenugreek and lentil soup hot, garnished with fresh cilantro or parsley if desired.

Enjoy this comforting and menopause-friendly meal!

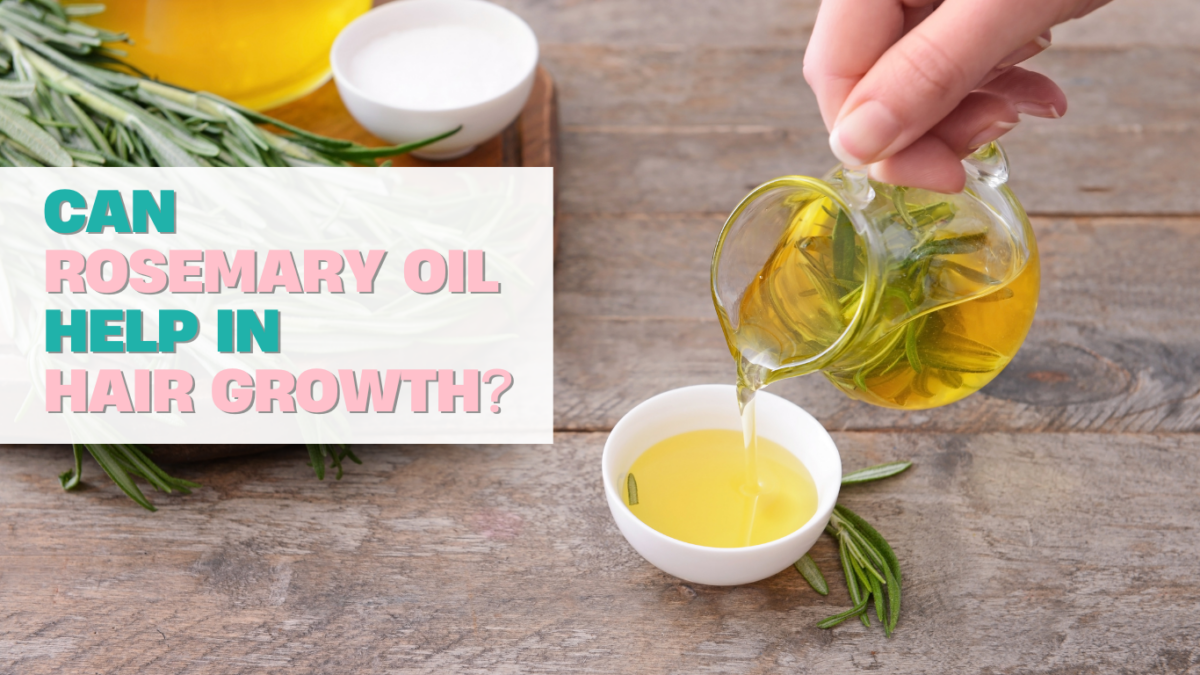
Can Rosemary Oil Help in Hair Growth?

Ever heard about the magic of rosemary oil for hair? This isn’t just your regular kitchen herb. Rosemary oil, rooted deep in history, is quite the champ for boosting hair growth and tackling thinning spots.

Does this stuff actually work, though?

John Horton’s Health Essentials podcast recently talked about rosemary oil for hair growth, not the cooking kind. Dr. Shilpi Khetarpal, a Cleveland Clinic dermatologist, was on the show to chat about this interesting topic. She said hair is a big deal, culturally and personally, and it’s a common concern in her practice, especially in our online world.

They discussed a 2015 study that compared rosemary oil to 2% minoxidil (Rogaine). The results were promising, but you got to be consistent with using it. They recommend applying it to your scalp every day, though some people might not like the oily feeling.

Dr. Khetarpal explained that rosemary oil, from the actual plant, has a bunch of good properties. It can help with tissue repair, cell turnover, and even scalp circulation. This increased blood flow can feed your hair follicles and lead to healthier hair. Plus, rosemary oil’s anti-inflammatory and antioxidant properties can help fight hair loss and promote growth.

If you’re thinking about trying rosemary oil, Dr. Khetarpal has some tips. Get a pure, fragrance-free version and do a patch test first. There are a bunch of commercial products with rosemary oil, but choose a reputable brand. How you apply it depends on your hair type, but a small amount (about a teaspoon) should be enough for your whole scalp. For best results, use it two to three times a week for at least six months.

What happens if you put rosemary oil in your hair?

Well, the oil itself can be a bit of a buzzkill for your hairdo. If you’ve got thin or fine hair or not a ton of it, using rosemary oil might leave your locks looking all greasy and weighed down. Not a good look, right? If that’s your jam, try slathering this stuff on as a pre-shampoo treatment, but only on days when you’re planning to use a clarifying shampoo.

So, how often should you get cozy with rosemary oil in your hair?

If you’re battling the itchiness from dandruff, mix the oil with some other stuff and slap it on your scalp three to four times a week. Give your noggin a 20-minute massage, then wash it all out with shampoo.

Now, if you’re one of those fine-haired peeps or your scalp’s got a thing for producing extra oil, you might want to use rosemary oil as a scalp treat once a week. Just remember to wash it out pronto to dodge the greasy look.

Can you snooze with rosemary oil in your hair?

Nope, that’s a no-go, according to our expert. Leaving any oil hanging out on your scalp all night can mess with your scalp’s little ecosystem, causing itchiness and redness. And guess what? This rule applies to all oils, not just rosemary.

So, how should you actually use rosemary oil for your hair?

  • Well, don’t just go dumping it straight on your head. Start slow – like once or twice a week.
  • Mix about five drops of rosemary essential oil with a friendly carrier oil like coconut or jojoba.
  • Give your scalp a little love for five to ten minutes, then rinse it out. Diluting the pure stuff helps tone down its power and keeps your skin from getting all cranky.
  • If you’re feeling adventurous, you can blend rosemary oil with other essential oils.
  • Or, if you’re a lazy genius, just toss some in your regular shampoo or conditioner and get the benefits while you wash.

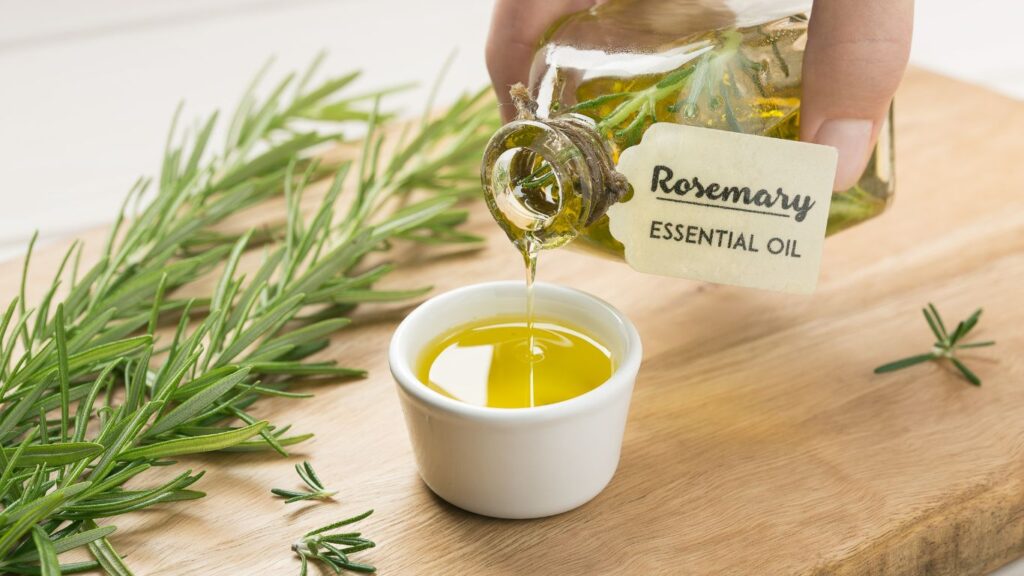
DIY Rosemary Oil Recipe using Fresh Rosemary

DIY Rosemary Oil for Hair Growth

Ingredients

  • 1/2 cup of castor oil
  • 1/2 cup of coconut oil
  • 1/2 cup of fresh rosemary sprigs

Directions

  1. Wash the rosemary sprigs thoroughly under tap water to ensure they’re free from any contaminants. Gently dab them with a dry cloth.
  2. Finely dice the rosemary to bring out its fragrant essence.
  3. In a saucepan, combine the coconut and castor oil, then mix in the diced rosemary.
  4. Warm the mixture on a low flame, allowing it to infuse for roughly 30 minutes. Make sure to stir now and then to avoid the rosemary from adhering to the pan’s base.
  5. Once done, set the saucepan aside and give the oil some time to cool down.
  6. Position a fine sieve over a pristine container or jar. Gradually pour the oil, ensuring the rosemary remnants are trapped by the sieve.
  7. Gently press the rosemary against the sieve using a spoon or your fingers to squeeze out any lingering oil.
  8. Dispose of the residual rosemary and pour the purified rosemary oil into a sterile, tinted glass container for keeping.
  9. To maintain the oil’s efficacy, store the container in a shaded, chilly spot.

And if you’re not into DIY mode, no sweat. There are plenty of hair products out there that already have rosemary oil in the mix. So, go ahead, pamper those locks!